Showing posts with label PR contest. Show all posts

Wednesday, November 19, 2014

Fall/Winter Handbag

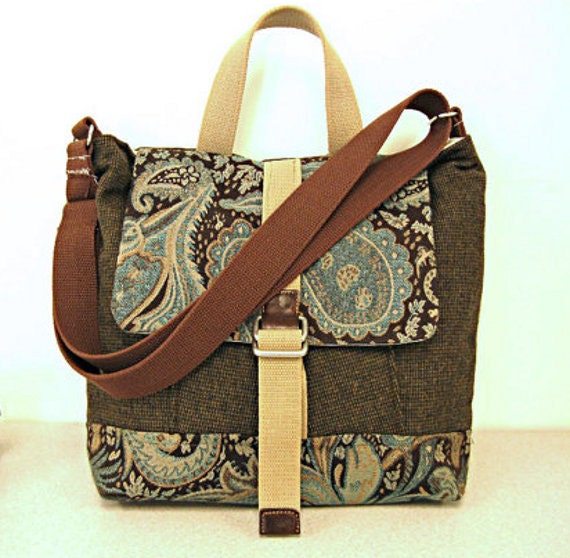
I made a bag for the Pattern Review "Handbag" contest.


This was my inspiration:


I used this pattern.  It's a free PDF download.


I wanted a  zippered pocket on the back like this:


I started with the free Kennedy bag pattern from Sew Sweetness. This is a great pattern.  It prints out good and the instructions are very through.   Her bag's finished size is 11 x 14  with a 5 inch bottom.  That was little bigger than I wanted plus I wanted mine to be more of a square shape, so I made mine 10.5 x 12.5 with a 4.5 inch bottom.  Even though I like a fairly large handbag, this is still a little bigger than I like.

I used 7 different upholstery samples.  These came from a local fabric store and were given to me by my niece that works there. When they replace them and toss the old ones, she passes some of them on to me.

For the lining, I used a medium weight brown cotton piece that was left over from another project.

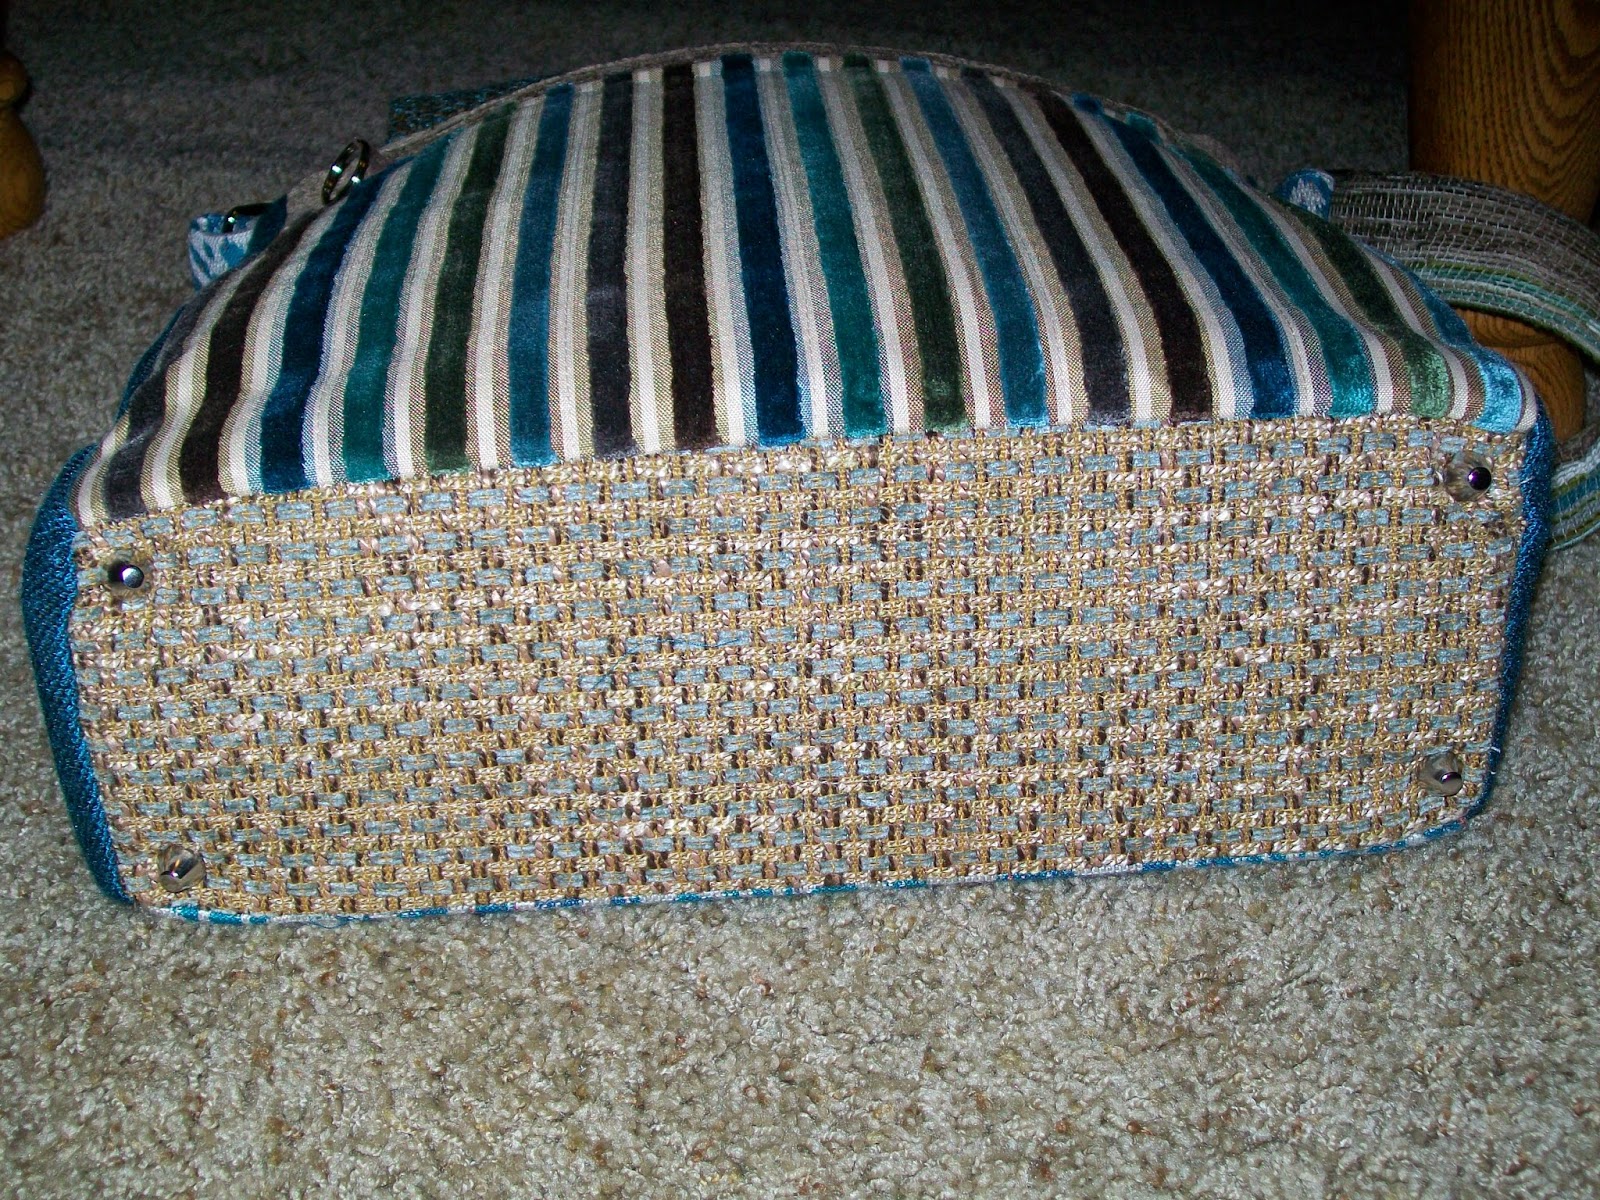
I added feet to the bottom;  used split rings for the zipper pulls; and a magnetic snap for the closure.


I added a large outside zippered pocket on the back


Underneath the flap, I added a 5 x 8 inch lined pocket that I use for my cell phone


There's also an inside zippered pocket.


Feet on the bottom


Side panel


Saturday, August 23, 2014

Tee Shirt Contest

I'm participating in a contest on Pattern Review that runs through August.  The contest is called "TNT Tee".  The important component of this contest is the fit of the tops.  The only requirement is to use one pattern to make at least 4 knit tops.  The pattern may be modified as to neck and sleeve styles and length and shape of the body.


I'm using Vogue 1861, which in now out-of-print. I started with a size large (as I wanted loose fit).  Fit alterations I made are:  narrowed and lowered the neckline (front & back); removed 1 inch from shoulder width; and lowered the armhole 1/2".   I had an issue with the sleeves not hanging correctly, so I rotated the sleeves toward the back and added a little to the back shoulder length. Now this is my TNT basic knit top pattern.


TOP #1

I added 3 inches to the length and added a little to the side seams to get more drape.  The fabric is a poly/spandex ITY jersey I purchased several years ago from Fabric Mart. Hems were finished using my coverstitch machine. I had trouble with tunneling that I worked out by the time I finished.  Neckline was bound, turned to inside and double-stitched.  This one is 1/2" wide; all the others I used 1". I decided the back neckline is a little low on this one, so I raised it up for the other tops.


TOP #2


This top is the same size and shape as Top #1, but I used raglan sleeves.  The floral fabric is a  ITY jersey that I got at Fabric Mart several years.  I used a solid black poly/lycra ITY jersey that I recently got from Fabric.com  I added a 1" neck band and sleeve bands from the same black fabric. I love both of these fabrics and very happy with how this top turned out.


TOP #3


This one is a basic loose fitting tee shirt, and since it's black, I'm sure I'll wear it a lot.  The fabric is a textured, light weight poly/lycra.   I made it a couple inches shorter and less full; and also straightened the hem by shortening the side hem points.   I added a 1" wide neckband using this method:  neckline-binding-for-knits by Sarah Veblen.  Since finding this, it's my favorite way to do the neckline on knit tops.


TOP #4

This is made exactly like the black one (top #3).  The fabric is a light-weight cream colored lacy look knit.  I paid $3.00 yard for it, and this is the 2nd top I've made from it.  I got it last year at Zinck's fabrics in Berlin, Ohio.  zincksfabric.com.  This is a no-frills fabric outlet in a warehouse type metal building.  It has inexpensive fabrics and a few notions and quilt batting.  A fun place to shop!


I'm happy with all four tops and plan to make a couple more for winter - maybe a cowl neck and a lace one.

Monday, April 28, 2014

M5977 - Embellished Tank


McCall's 5977 is the basis for my top.  I started with a size 14, but added width at the hip area & lengthened by 2 inches.  So it's more of a tunic now.  I like the fit of this pattern; the neckline and armholes are the right size, with no gaping.


Side view.   I cut the center front from the print fabric and added to sides of the front using the stripe fabric.    I cut bias strips and used it to finish the neckline and armholes.


Back view, showing narrow strip I added to the bottom.  I used 2 coordinating quilting fabrics.


I added a peter pan collar.


Underside of the collar, showing the stripe fabric


I think it turned out cute & will be good to wear this summer.


Monday, April 1, 2013

Pantone Spring Colors - PR Contest

2013 Spring Pantone Contest
Pattern Review pantone colors contest

I've entered the new contest over at Pattern Review. The idea is to make a 2 piece ensemble using the spring Pantone colors.  Both items must predominantly feature one or more of the Pantone colors.


Right now, my plan is to make a top using this floral knit.   This fabric has 3 of the colors: poppy red, nectarine and grayed jade.   The only problem is I only have 1 yard of fabric. 


Looking thru my patterns, I came up with one that might work.  I'm going to try view "B",  using a white knit for the insert "cami" part.


I still have to come up with a coordinating pattern and fabric for a either a skirt or pants. I'm thinking red..........

Sunday, February 10, 2013

New Handbag


Handbag Contest   
As is usual when I make a bag, I didn't go by a pattern.  I had an idea of what I wanted and just started with a basic shape of a front and back with a 4 inch gusset.  I made 2 inside zipper pockets and 2 outside zipper pockets. The finished size is 10 inches high and 12 inches wide.  The strap is 2 inches wide and 24" long.

I used 2 upholstery fabrics that I got at Joann Fabrics on the “red tag” table when it was 50% off, so I paid probably $5.00 for the fabric.   When I saw this fabric, I knew it would be great for a handbag.  For the lining I used a black twill and the printed fabric for the pockets.  I made one side of the bag  the black print fabric with a gold pocket and the other side is the gold  fabric with a black print pocket.  I did this just to add a little extra something. 

For the strap I used a 2 inch wide black webbing and then sewed a piece of the purse fabric on top of it.  The reason I made the strap this way is the webbing gives it strength without the layers and bulk of interfacing.   But by itself, it’s kind of plain, so I added the fabric layer.  The 2 inch webbing is kind of hard to find, but I wanted it that wide since there’s only 1 strap.

I really enjoy making handbags.  I'm pretty happy with how this one turned out, although I do wish I'd made it just a little bit bigger.


Friday, August 10, 2012

Bucket Bag

I entered another contest on Pattern Review.  This was a 2 week challenge contest to make a handbag.  Since I had never made one, I decided I wanted to try a bucket style bag.  

Inspirations for my bag.


I like the combination of
different fabrics and leather.


I like the straps on this one.


My Review


Description: A bucket bag style handbag.

Size: Finished size is 11 inches tall, 15-1/2 inches wide at the top, with a 7 inch bottom. The straps are 1-1/2" wide and 24" long. I added 2 inside zipper pockets and 2 small zipper pockets on the outside. I use the inside ones for papers, receipts, etc. and the outside ones for keys and cell phone.

Fabric Used: I used upholstery fabric for the body; vinyl for the bottom, straps and a 2" wide strip along the sides; and a brown twill for the lining. The vinyl was easy to sew, but the needle made little holes in it. So if (or when) I made a mistake, it shows up. No way to undo that, so I just try not to see it To add more interest, I cut the bag with the design of the fabric running crossways on one side. On the other side I turned it to run the design up and down, plus added a 2 inch wide strip of the vinyl along the sides. The tacks on the straps are purely decorative. I use some antique brass upholstery tacks I found in my supplies. I pushed them through & bent over the backs to hold them in place. I used small pieces of the vinyl to make ends on the zipper.

Pattern Used: I didn't have a pattern for this style bag, so I drafted my own.

Did it look like the photo once you were done sewing with it? Yes, it turned out like I had envisioned.

Conclusion: I love making handbags. It's great to be able to make it the size I want with the pockets I want and the straps the length I want. I don't normally use a pattern, just have an idea and then make it up as I go along. Sometimes this works out & sometimes not. But overall, I'm pleased with how this one turned out.


Now the pictures of my bag:


Wednesday, June 20, 2012

Just 1 more: McCall's 5138 again

I decided to make 1 more shirt from this pattern.  I picked up the fabric at Joann's last week.  It was on the red tag table and was 50% off - so only $4.00 a yard.  It has just a little bit of stretch to it.  For the fabric, buttons & thread, I have about $10.00 in this shirt.  For this version, I added cuffs and tabs to the sleeves and breast pockets.  I cut the sleeve cuffs and pockets on the diagonal to add more interest.  I love how this shirt fits me, so I traced a permanent copy onto plastic sheeting.  It's amazing how comfortable clothing can be when it fits properly!

Here's a few pictures:


Sunday, June 10, 2012

PR Contest-McCalls 5138 Blouse Review


This is my entry for the PR "One Pattern, 
Many Looks" contest.  I needed some 
summer blouses & this contest 
was just the incentive I needed.  
The rule was to use 1 pattern and
make at least 2 variations of the same
item.  I used this pattern and made
3 short sleeve blouses.

Description:Misses fitted blouse with front & back horizontal darts; sleeve length options, convertible collar, and shaped hem.

Sizing:I made size 14 at shoulders going out to sz 16 at hips. Note that this is a close fitting blouse. So for the 2nd & 3rd versions, I added a little to the side seams to get a little looser fit.

Fabric Used: For my 1st version, I used a cotton blend from WalMart that I paid $1.50 a yard. It’s actually nice and such a pretty watercolor print. It doesn’t wrinkle much, but does ravel quite a bit. For my 2nd version, I used a light weight cotton that I got at a local fabric store. It has a textured design on it. For the 3rd version, I used a cotton from Joann Fabrics. I believe it’s a “quilting” cotton, but it’s heavier than most and comes out of the dryer hardly wrinkled and has a very nice feel to it. And I LOVE the print.

Pattern alterations and design changes :I took 1" off the shoulder - this is a standard alteration for me. Changes for View 2 and 3: added to side seam; omitted the front vertical darts; increased bust dart a little; made a sway back adjustment; added 2 inches to the length.

Sleeves: version 1 has a narrow band; version 2 is plain; version 3 has cuffs in contrasting fabric.

I changed how the back neck is faced. The pattern has you to clip the undercollar, fold under and stitch to cover the seam. I did this on my 1st blouse, but I don’t really like this method. So, for the 2nd & 3rd versions, I used a bias strip as a “mini facing”. I think this is much better; it’s neater and actually easier to do.


Love this & will do all my collars this way from now on.
I made the collar using this method.  collar

Conclusion: Now that I’ve got the fit right, I love this pattern. It’s a basic blouse that’s quick and easy to make. Only 4 pattern pieces: front, back, collar and sleeve. Plus the sleeve band or cuff, if you like. And it’s well drafted; everything fits together very well. The only issue I have is that there’s a little too much ease in the sleeve cap. I would definitely recommend this pattern.

First blouse


I didn't make a sway back adjustment on the 1st one, 
but did on the 2nd & 3rd,  and the fit is so much better.


3rd blouse


with sway back adjustment